Unleash Your PC's Potential: A Comprehensive Guide to Cleaning Fans
Hey there! If you're reading this, chances are you've noticed your computer isn't quite performing like it used to, or maybe it's sounding more like a jet engine taking off than a quiet workstation. You're not alone, and I've got some good news: a common culprit is often just dirty PC fans. Keeping your computer's fans clean isn't just about reducing noise; it's absolutely crucial for maintaining optimal performance, preventing overheating, and extending the lifespan of your valuable hardware. I've seen firsthand how a little bit of dust can cause a whole lot of trouble, and trust me, it's a fix you can totally handle yourself!
Why Cleaning Your PC Fans Matters So Much
Before we dive into the nitty-gritty, let's chat for a moment about *why* this task is so important. Your PC's fans are its lungs, pulling in cool air and expelling hot air. Over time, these fans inevitably suck in dust, pet hair, and other airborne particles, which then build up on fan blades, heatsinks, and vents. This buildup acts like an insulating blanket, trapping heat inside your system. When components like your CPU and GPU get too hot, they automatically slow down their operations – a process called 'thermal throttling' – to prevent damage. This means your games will stutter, your video editing will lag, and even simple browsing can feel sluggish. Nobody wants that, right?
Beyond performance hits, chronic overheating can actually shorten the life of your components. Plus, that annoying whirring sound? It's often the fans working overtime, struggling to push air through clogged pathways. A clean PC is a happy, quiet, and fast PC, and I'm here to show you how to get yours there.
The Essential Toolkit: What You'll Need
Don't worry, you won't need a professional workshop for this. Most of these items you might even have lying around. Here's what I recommend grabbing:
- Compressed Air Can: This is your best friend for blasting away dust from hard-to-reach spots. Just be sure to use it in short bursts and hold the can upright to avoid expelling liquid propellant.
- Soft-Bristled Brush: A clean, unused paintbrush (around 1-inch wide) or an anti-static brush works wonders for gently sweeping dust off fan blades and heatsink fins.
- Microfiber Cloths: Excellent for wiping down surfaces without leaving lint or scratches.
- Small Screwdriver Set: You'll likely need a Phillips-head screwdriver to open your PC case and possibly remove some fans.
- Cable Ties or Velcro Straps: Handy for tidying up cables after you're done, improving airflow.
- Isopropyl Alcohol (90%+): If you plan on re-applying thermal paste (which isn't strictly necessary for just cleaning fans, but good to have if you delve deeper into CPU/GPU heatsinks), you'll need this.
- Anti-Static Wrist Strap: Highly recommended to prevent electrostatic discharge, which can damage sensitive components.
- Good Lighting: A flashlight or headlamp will help you see all the dusty nooks and crannies.
Safety First, Always!
Before you even think about cracking open that case, we've got to cover safety. This isn't just a suggestion; it's a must. I've always prioritized this, and you should too!
Power Down and Unplug
This sounds obvious, but it's super important. Turn off your PC completely, not just putting it to sleep. Then, disconnect *all* cables from the back: the power cord, monitor cables, USB devices, everything. Give it a minute or two to allow any residual power to drain from the system.
Preventing Static Electricity
Static electricity is the silent killer of PC components. Touching components while charged can send a tiny jolt that fries them. Here's how to avoid that:
- Use an Anti-Static Wrist Strap: Clip it to a bare, unpainted metal part of your PC case.
- Work on a Non-Carpeting Surface: A wooden or tiled floor is much better than carpet.
- Periodically Touch a Grounded Metal Object: If you don't have a wrist strap, frequently touch the unpainted metal of your PC case to discharge any static buildup from your body.
Getting Down to Business: A Step-by-Step Cleaning Guide
Alright, with safety out of the way, let's open up that beast!
1. Opening Your PC Case
Most desktop PCs have side panels that are held on by a couple of thumb screws or standard Phillips-head screws at the back. Unscrew them, then gently slide the panel backward and lift it off. You might need to remove both side panels for better access and airflow during cleaning. I typically lay my tower flat on its side for easier access inside.
2. Identifying Your Fans
Once you're inside, you'll probably see a few different types of fans. It's good to know what you're looking at:
- Case Fans: These are usually mounted on the front, back, top, or bottom of your case, helping move air in and out.
- CPU Fan/Heatsink: Located directly above your CPU (often a large block of metal fins with a fan on top).
- GPU Fans: On your graphics card, often two or three fans integrated into the card itself.
- PSU Fan: Inside your power supply unit, usually visible from the bottom or back of the PSU.
3. Cleaning Case Fans
These are often the easiest to clean. I usually start here.
- Hold the Fan Blades: Crucial step! When using compressed air, hold the fan blades gently to prevent them from spinning rapidly. If a fan spins too fast from compressed air, it can actually generate a small electrical current that could potentially damage the fan's motor or even the motherboard.
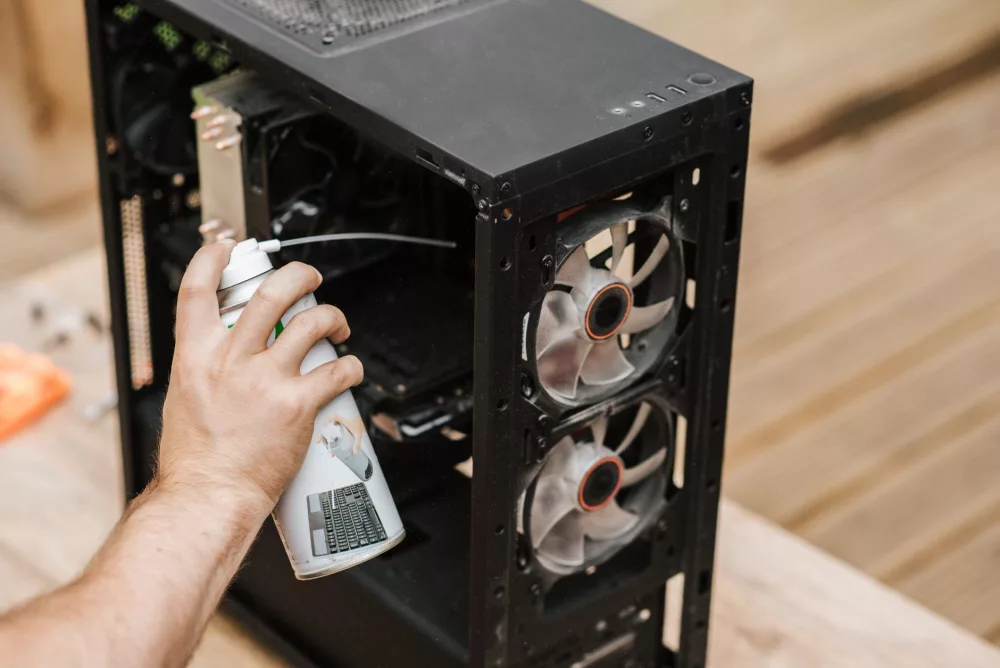
- Blast with Compressed Air: Use short bursts to dislodge dust from the blades and the fan housing. Work in a well-ventilated area, or even better, take the case outside, because a LOT of dust is about to come out.
- Brush and Wipe: For stubborn dust, use your soft-bristled brush to gently sweep it away, followed by a microfiber cloth for any remaining grime.
- Consider Removal (Optional): For a truly deep clean, you might unscrew case fans from their mounts. This allows you to clean both sides of the blades and the area beneath them thoroughly. Just be mindful of the fan's orientation (airflow direction) when you put it back.
4. Cleaning the CPU Fan and Heatsink
This area tends to be a major dust magnet due to the heatsink's many fins. The CPU is vital, so we'll treat it with care.
- Hold the Fan Blades: Again, stabilize the fan blades before using compressed air.
- Compressed Air on Heatsink Fins: Direct short bursts of compressed air into the heatsink fins, trying to blow dust *through* the fins rather than just around them.
- Brush Gently: Use your brush to carefully sweep dust out from between the fins. This can be a bit delicate, so take your time.
- Don't Remove the Heatsink Unless Necessary: Unless you're planning on reapplying thermal paste (a separate, more advanced task), I wouldn't recommend removing the CPU heatsink. Re-seating it improperly or without fresh thermal paste can cause overheating problems.
5. Tackling GPU Fans
Graphics cards often run hot, so their fans work hard and collect a lot of dust.
- Access: Depending on your GPU, the fans might be partially shrouded. You'll likely have to angle your compressed air nozzle.
- Hold and Blow: Just like other fans, hold the blades still and use compressed air in short bursts. Pay attention to the heatsink fins beneath the fans.
- Brushing: Carefully use your brush to dislodge dust from the fan blades and any exposed heatsink areas.
- Deep Cleaning (Advanced): Some tech enthusiasts remove the entire GPU heatsink assembly for a thorough clean and thermal paste replacement, but this is usually overkill for general fan cleaning and voids warranties on some cards, so proceed with extreme caution if you go this route.
6. Addressing the PSU Fan
The power supply unit (PSU) also has a fan, but it's usually enclosed. You really, really shouldn't open your PSU – it contains capacitors that can hold a dangerous electrical charge even when unplugged. It's a serious shock hazard.
- External Cleaning Only: For the PSU, simply use compressed air to blow dust out of the vents and fan grille from the outside. Again, hold the fan blades if possible through the grille.
Final Touches and Prevention
Once all your fans and internal areas look sparkling clean, you can do a few more things.
- Cable Management: Use those cable ties or Velcro straps to bundle cables neatly. Good cable management isn't just for looks; it significantly improves airflow within the case.
- Clean Exterior Vents: Wipe down any external dust filters or vents with your microfiber cloth.
- Reassemble Carefully: Put your side panels back on, ensuring they're properly seated and secured.
- Plug Everything Back In: Double-check that all cables are securely reconnected before powering on.
How Often Should You Clean?
This really depends on your environment. If you have pets, live in a dusty area, or smoke, you might need to clean every 3-6 months. For most people, a good deep clean once every 6-12 months is usually sufficient. I personally aim for a quick blast of compressed air every few months, with a more thorough cleaning annually.
A Happier, Healthier PC
You've done it! By taking the time to clean your PC fans, you've not only saved yourself from potential headaches but also ensured your system runs cooler, quieter, and faster. It's a simple maintenance task that pays huge dividends in terms of performance and hardware longevity. I think you'll notice the difference almost immediately. Now go enjoy that refreshed, responsive computer!
About Editorial Team
Senior columnist and culture critic specializing in architectural designs, emerging high-growth systems, and contemporary philosophies.